-
안드로이드 스튜디오와 node.js를 연동하여 회원탈퇴 기능 구현하기플젝기록/한이음 프로젝트 2021. 8. 19. 11:39
기능 구현하기에 앞서, 우선 AWS의 ec2에 RDS를 설치했고 RDS중에서 MySQL을 이용했다.
그리고 나는 window이기 때문에 putty를 이용하여 서버에 접속했다. 아래 블로그를 참고하여 EC2인스턴스에 접속했다.
[AWS] EC2 인스턴스 Putty 로 접속하기
리눅스 환경이라면, ssh -i <파일> <서버IP> 옵션을 줘서 간단하게 접속할 수 있습니다. 윈도우 환경에서는 그럴수 없으므로 Putty 를 사용하여 EC2 인스턴스에 접속합니다. 접속하는 방법을 알아보겠
mozi.tistory.com
https://blog.naver.com/zion830/221661486117
AWS를 활용한 안드로이드 앱 (6) 안드로이드에서 로그인, 회원가입 구현하기, Retrofit 라이브러리로
이 글은 본인의 AWS 이용기를 정리한 글로, 글 전체의 목차는 https://blog.naver.com/zion830/22135330...
blog.naver.com
위 블로그를 많이 참고했다.
프로젝트가 어느정도 진행되었는데, 그중에서 몇가지만 포스팅 해보려고 한다.
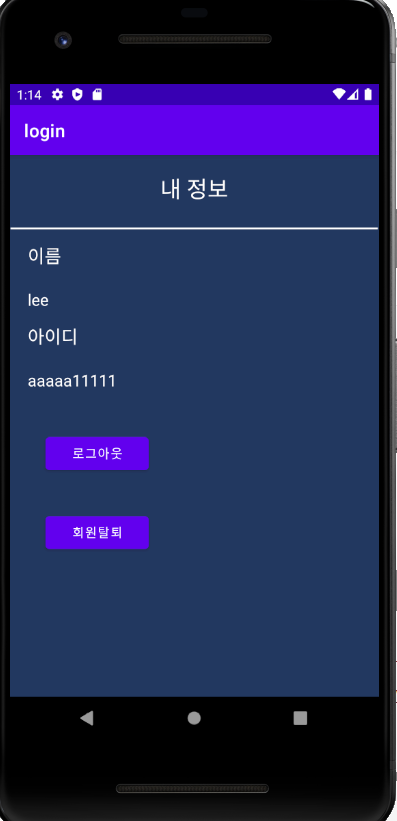
내가 맡은 부분중에 하나가 회원탈퇴 기능이었는데, 회원탈퇴 기능을 통해 전체적으로 node.js와 안드로이드가 연동하는 과정을 확인할 수 있다.
Retrofit 라이브러리를 이용하여 통신을 설정했다.
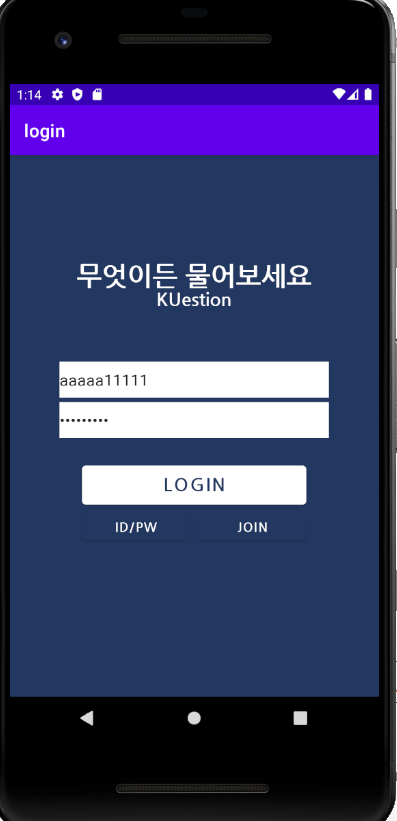
(ui는 나중에 수정할 예정이다.)

<인터넷 설정 -AndroidManifest.xml>
인터넷 설정과 page설정해주기
 <uses-permission android:name="android.permission.INTERNET" />

 <activity android:name=".MemberPageActivity" />
<데이터 클래스 >
각각 서버에 전송하고, 서버로부터 응답받을 데이터들을 정의했다.
FindPwData_delete.java
package retrofit;

import com.google.gson.annotations.SerializedName;

public class FindPwData_delete {

    @SerializedName("passwd")
    private String passwd;

    @SerializedName("id")
    private String id;

    public FindPwData_delete(String passwd, String id) {
         this.passwd = passwd;
         this.id= id;
    }

}
FindPwResponse_delete.java
package retrofit;

import com.google.gson.annotations.SerializedName;

public class FindPwResponse_delete {

    @SerializedName("code")
    private int code;

    @SerializedName("message")
    private String message;

    public int getCode() {
        return code;
    }

    public String getMessage() {
        return message;
    }

}
<API 인터페이스 정의>
서버에 요청하고, 요청받는 방법을 정의한 인터페이스이다.
PWFind라는 메소드를 호출하면 FindPwData_delete 타입의 data를 서버에 넘겨주고,
FindPwResponse_delete 타입의 데이터들을 서버로부터 받게되는 형식이다.
데이터 형식은 위에서 정의했다.
package retrofit;

import retrofit2.Call;
import retrofit2.http.Body;
import retrofit2.http.POST;

public interface ServiceApi {

    @POST("/user/findPW_delete")
    Call<FindPwResponse_delete> PWFind(@Body FindPwData_delete data);

}
MemberPageActivity.java
xml코드에서 '탈퇴하기'버튼의 id값은 deleteMemberButton이다.
여기서 핵심코드는
service.PWFind(new FindPwData_delete(input_pw, input_id )).enqueue(new Callback<FindPwResponse_delete>() {
@Override
public void onResponse(Call<FindPwResponse_delete> call, Response<FindPwResponse_delete> response) {onResponse메소드를 오버라이딩해서 주고받는 데이터타입을 설정함.
response.body를 통해 FindPwResponse_delete 데이터 타입에 접근할 수 있다.
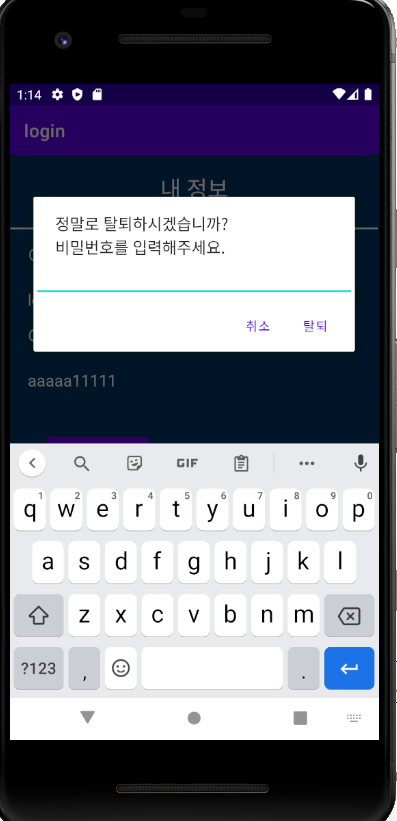
 Button deleteMemberButton = (Button) findViewById(R.id.deleteMemberButton);
        deleteMemberButton.setOnClickListener(new View.OnClickListener() {

            @Override
            public void onClick(View view) {
                String input_id = id;
                EditText editText = new EditText(MemberPageActivity.this);
                AlertDialog.Builder builder = new AlertDialog.Builder(MemberPageActivity.this);
                builder.setTitle("정말로 탈퇴하시겠습니까? \n" +
                        "비밀번호를 입력해주세요.")
                        .setView(editText);

builder.setPositiveButton("탈퇴", new DialogInterface.OnClickListener() {
                    @Override
                    public void onClick(DialogInterface dialogInterface, int i) {

                        String input_pw = editText.getText().toString();
                        System.out.println(input_pw);//잘 들어옴

                        //데이터베이스의 passwd 비교
                        service.PWFind(new FindPwData_delete(input_pw,input_id)).enqueue(new Callback<FindPwResponse_delete>() {

                            @Override
                            public void onResponse(Call<FindPwResponse_delete> call, Response<FindPwResponse_delete> response) {
                                FindPwResponse_delete result = response.body();
                                System.out.println(result.getCode()); // 잘 들어옴

                                if (result.getCode() == 200) {
                                    Toast.makeText(MemberPageActivity.this, result.getMessage(), Toast.LENGTH_SHORT).show();
                                    Intent intent = new Intent(getApplicationContext(), MainActivity.class);
                                    startActivity(intent);
                                } else {
                                    Toast.makeText(MemberPageActivity.this, result.getMessage(), Toast.LENGTH_SHORT).show();
                                }
                            }

                            @Override
                            public void onFailure(Call<FindPwResponse_delete> call, Throwable t) {
                                Toast.makeText(MemberPageActivity.this, "탈퇴 에러", Toast.LENGTH_SHORT).show();
                                Log.e("탈퇴 에러", t.getMessage());
                                //탈퇴 에러시 그대로..
                                Intent intent = new Intent(getApplicationContext(), MainActivity.class);
                                startActivity(intent);

                            }
                        });


                    }
                });
서비스 객체 생성해주는것도 잊지말자
service = RetrofitClient.getClient().create(ServiceApi.class);RetrofitClient.java
retrofit 통신을 정의해준다.
포트번호를 바꿀때 BASE_URL의 port번호도 꼭 바꿔줘야한다.
package retrofit;

import retrofit2.Retrofit;
import retrofit2.converter.gson.GsonConverterFactory;

public class RetrofitClient{
    private final static String BASE_URL = "ec2주소";
    private static Retrofit retrofit = null;

    private RetrofitClient() {
    }

    public static Retrofit getClient() {
        if (retrofit == null) {
            retrofit = new Retrofit.Builder()
                    .baseUrl(BASE_URL) // 요청을 보낼 base url을 설정한다.
                    .addConverterFactory(GsonConverterFactory.create()) // JSON 파싱을 위한 GsonConverterFactory를 추가한다.
                    .build();
        }

        return retrofit;
    }
}
main.js
node.js 코드이다. 여기서 데이터베이스로 접근할 수 있다. json형식을 통해 데이터를 주고받을 수 있다.
app.post('/user/findPW_delete', function (req, res) {
    var passwd = req.body.passwd;
    var id = req.body.id;

    var sql = 'select * from user where passwd = ? and id =?';
    var params = [passwd,id];

    connection.query(sql, params, function (err, result) {
        var resultCode = 404;
        var message = '에러가 발생했습니다';


        if (err) {
            console.log(err);
        } else {
            if (result.length === 0) {
                resultCode = 204;
                message = '비밀번호가 틀렸습니다.';
            }else {
                var id = result[0].id;
                var sql2 = 'delete from user where id = ?';
                connection.query(sql2,[id], function (err, result) {
                    if(err){
                        message ='계정삭제 오류 발생';
                    }

                });
                resultCode = 200; //탈퇴 성공
                message ='탈퇴가 완료되었습니다.';

        }
    }

        res.json({
            'code': resultCode,
            'message': message,
        });


    });
});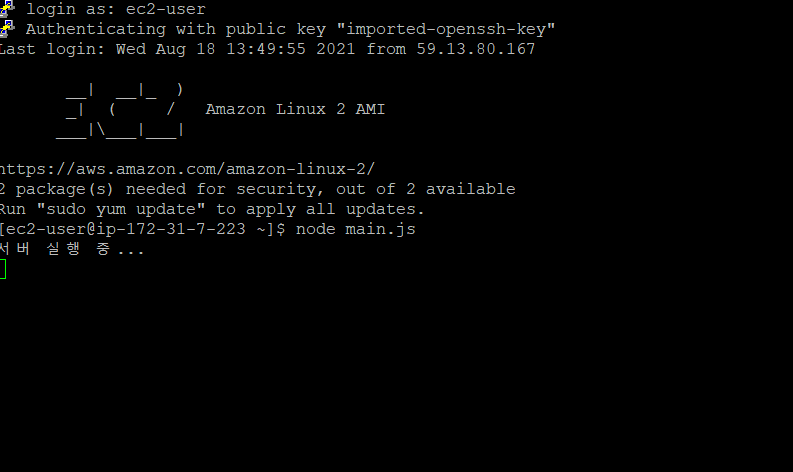
ec2 서버 실행중인 모습.. '플젝기록 > 한이음 프로젝트' 카테고리의 다른 글
안드로이드 스튜디오와 node.js를 연동하여 아이디 중복확인 설정하기 (0) 2021.08.19